Sunday, 10 August 2014

...A Woolly jumper!

OK, bit of a gap between posts, but it took longer to finish the jumper than expected and then it's all been a bit busy. But it is finally done!

Not your run of the mill jumper.

In my last post I mentioned that I needed to check the sizing because I might not have made the right one, well, turns out I was making a size too small. First lesson kids: always measure yourself before picking a size to make. Real rookie mistake. But how to fix this? My idea was just to make two panels and sew them in under the arms, but after talking to someone at work, they suggested picking the stitches up one edge then working the same number of rows as stitches I was missing. This then meant I only had to sew one seam per side rather than two. And it worked. Really well in fact. The change in stitch direction also makes it look deliberate rather then just trying to cover up the mistake.

It was meant to look like this...honest.

Rookie mistake number two was not double checking which sides I was sewing when putting it together so I managed to sew one side up with the right side of one piece and wrong side of the other both on the same side *slaps forehead* Putting the arms in was really simple too, just a case of picking up stitches, the correct number for the size I should have been making with the added panel I put in, and knitting. I was worried when I was doing it the sleeves may have been a bit long (being short sleeves sometimes are a bit long), but they've come out as great little cap sleeves, more or less.

Teeny-tiny sleeves.

Once the two front pieces and back were attached, and arms put in, I could work on the hood. Really straightforward, just knitting straight rows to make what seems like a massive 80s collar before it's seamed across the top. When I reached the point that the pattern said to seam it just didn't seem big enough... so I did a few more rows. I now have a giant hood. It definitely covers my head, which I think is the basic purpose of a hood, even if it does restrict my vision a bit.

Last step was just the ribbed button band that runs all the way from the bottom of one side, around the hood and down the otherside. Took a bit of fiddling about, I didn't want to buy a massive cable I wasn't likely to use again, and although Knit Pro (the make of needles I use) make a small part to connect two shorter cables, neither of my local yarn shops stock it. So it was a case of knitting along one then unscrewing the needles, putting ends on, attaching the needles to another wire and then starting along that cable. I had a bit of trouble picking up the 150-odd stitches I had to in order to do this, I kept over and under picking, but a friend's mum told me when she has to pick up a lot of stitches, she divides it into manageable chunks and works out how many she needs in each block. Shame I'd already moved on when she told me about this.


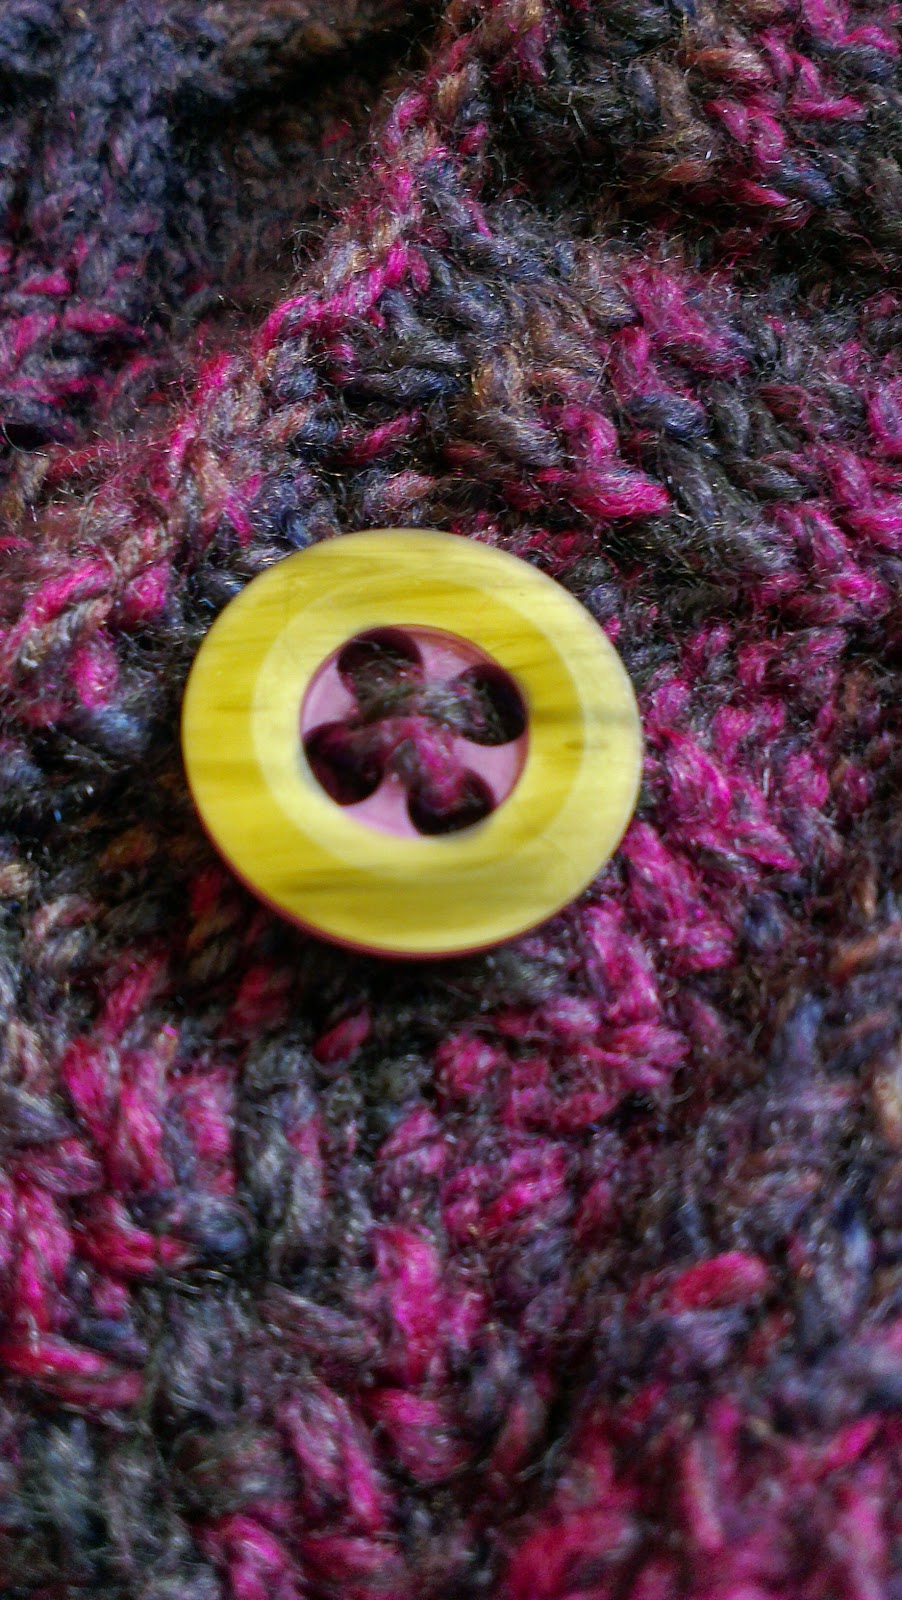
It's macro time!


The button holes were simple bind-off/cast-on type, but I think I need to work on them, or pick a different cast-on because they're a little loose. The buttons were a bit of a find in the local everything shop, I wanted wooden ones, and these have purple that is a really good match for my wool.

Just so happy to have finished it.

And voila, one jumper. I've worn it a couple of times, its really handy to have in the car, if it looks a bit grey and miserable before work I can wear it in and it squishes small enough to get in my bag if the weather picks up.

Sunday, 8 June 2014

What do you get if you cross a sheep and a kangeroo?

So, I'm sitting here, new tablet on my lap, the sun is shining, birds singing, glass of elderflower cordial on the table, and upstairs I have parts of a cardigan blocking in the spare room.
Ignore the hats, they're not part of this.

Why do I have a jumper on the go in June? Because I'm an idiot, I'm easily distracted or disheartened, and I just haven't pulled my finger out. I remember about this time last week saying "oh, I've got the three main parts done, I could be finished by next weekend". The plan was to block Monday or Tuesday, then take it in the car with me when I went out with a friend because she wanted to drive. I could have knitted the hood or something. Except I didn't do the blocking. But at least its done now. The problems I've had with this jumper have been there from the start.

Its my own fault, I needed a weird jumper. I get hot very easily, so even in winter I'll be running around in little tops, making old women feel cold and getting told I must be freezing. But sometimes its just nice to have something to throw on that won't be stifling, and a few years ago I found a great, short sleeved cardigan. The only problem is that it only does up at the top, and it flares out at the bottom and my belly gets cold. So I found a short sleeved cardigan that does up all the way down. I bought wool, great, its chunky so should knit up quickly. And then the problems really started. Following the instructions for casting on, the ribbing around the bottom, I had the set up for the cabeling. It just wouldn't add up. I thought I'd miscounted, maybe my maths were wrong, but no, I just couldn't get it to come out right.

So I went back to Ravelry and someone had mentioned the errata. Ta da, turns out it wasn't me, the pattern was incorrect. So since I got the corrections I have been plodding along, losing track of which line I'm on in the chart because it's been too long between picking up sticks, but finally I'm on the home straight.

But then I thought that last weekend. I've still got to check the sizing is ok (I'm worried I've made a size too small and I'm going to have to knit some sort of infill for under the arms to let it go around me, I know, rookie mistake), and then it's the hood, the arms, and the ribbed strip that goes from one bottom front, up around the hood and then down the other side. Nothing much then I guess. But thats the problem with big projects, and this is my first really big project, there's no win. I had to make this little guy the other weekend just to feel the satisfaction of completing something.

A one inch Godzilla. With wings.

And the weather has changed, I no longer need my jumper, I want to make some socks, try new techniques. I want to start a giant snood (although I want that for Autumn) and to start making baby things for a friend due in December. And theres other hobbies I want to do, like my wine making, and soon it'll be good for making jam. I guess I can't do everything, although by writing this I feel motivated to get it done, so (and I'm sure I'm jinxing myself) by next weekend it might be finished.

Tuesday, 4 February 2014

Emma's homemade, not shit, toad-in-the-hole.


Last week, whilst driving into work and trying to avoid the awful “call or delete” Radio 1 insist on playing every Wednesday, I tuned into Radio 2. Chris Evans had proclaimed it National Toad-in-the-Hole Day and had a range of TV chefs on the phone to tell everyone how to make it great. I don’t know who the first one on the line was, but he was called Mark. Mark proceeded to tell us how you can’t get the batter to rise as you would with a Yorkshire pud because there was no hot fat. He then carried on describing the process, seeming to do it mostly in a frying pan, chopping up the sausages and adding thyme to the batter, which, horror of horrors, he’d made with water!

Then came Tom Kerridge, not a chef I’ve watched but my dad (ex-head chef) seemed to like his roast potatoes, so I don’t think he can be all bad. He didn’t seem to like the idea of water in batter either but he started by telling everyone to make the batter the day before to rest it, and (making the whole enterprise pointless) cooking batter and sausage separately. That’s not a toad-in-the-hole, that’s a sausage with a Yorkshire pud.

Last came James Martin. “Here we go,” I thought, “a bit of sense, none of this ‘chopping sausages up’ nonsense, this will be good.” The first words out of his mouth were “weigh out 400g of flour…”
I turned him off. You don’t need to weigh for the batter, it’s done by volume. So, since no one seems to know how to make a decent one, I give you Emma’s Homemade, not shit, Toad-in-a-hole.

Emma’s Homemade, not shit, Toad-in-a-hole (for 2)

Two eggs
Plain flour
Milk
Sage (or any other herbs, fresh or dried)
Sausages

When Tom Kerridge said make the batter and give it time to rest, I think he was right. When he said it needed to be left overnight I think he may have been overdoing it. I make my batter first and it then has the time it takes to sort the sausages out. The best batter is done by volume, you don’t need a set of scales, a measuring jug will do (or even a mug, but a measuring jug has marks on it to make this easier). First, break your eggs into whatever you're measuring your ingredients with. Note the volume and then put into another bowl. Measure out your milk to the same point and then pour into the eggs. Then the same with the flour. It is a bit more difficult with the flour, I spoon it into the jug and shake to level out the flour. This can then join the milk and eggs. The reason I do the eggs first is because eggs are a fixed volume of fluid: you could measure 100ml of milk, but you may have to use a bit of an egg to get the same volume and that could be wasteful.

Eggs
Milk
Flour

Give the batter a good whisk (remember to get into the corners to get all the flour) and add some herbs. I used a small handful of fresh chopped sage out of the garden because I’m lucky enough to have it. The Mark guy from the radio show used thyme, but I don’t think it’s got a strong enough flavour which is why I picked sage.  I don’t think the herb choice really matters  too much; if you were having lamb sausages you could stick mint in the batter, or put in a mix if you have a variety of dried herbs in the cupboard, and if you don’t just add some salt and pepper (do this anyway, in fact, herbs or not).

I have a magic whisk.


Sage. It smells like sausages.


Put the batter to one side. Turn on the oven (I have mine about 180C fan) and get out the pan you plan to use. I choose quite a large one to give all the sausages room to cook and get the batter around them. Splash a bit of sunflower/vegetable oil in the bottom of the dish and add the sausages. Prick the sausages to let out fat so they don’t explode. Stick in the oven. By the way, I'm cooking six sausages, but two were used the next day for sandwiches.

This is the time to prep potatoes for mash, and veg, so that when the sausages are ready for batter, I can put the potatoes on to cook too.

Lots of fat. Take that, "Mark".

After 15/20 minutes, the sausages should be brown on top. Work quickly, turn the sausages over and pour the batter around them (maybe give it a quick whisk to make sure you’ve got no lumps).  After another 15/20 minutes you should have a batter that’s cooked and risen around the edges, giving everyone a bit of crunch and a bit of soft, like a Yorkshire pudding cross-section.


Having been waiting all week to have the time to make this, I may have gone a bit over board when dishing up, and made it a bit more special with mushroom and onion gravy (fry mushrooms and onions in a pan and add your normal amount of gravy granules mixed in double the amount of water when cooked. It will thicken up.)

So there you go. TV Chefs take note.


In my last post I talked about how bummed out I’d been and feeling like the world was piling on top of me. Well, the knitting project I wanted to do is finished (and I even made gloves to match the hat), the plants I wanted to move are all in pots (although a tornado seems to have gone through the garden and my gooseberry bush has disappeared). I’m even looking forward having (drunkenly) ordered some seeds and started off some more wine.  It’s been a very productive month.

RaaRaa likes his hat.

Thursday, 2 January 2014

Stuck in limbo...

I'm stuck. I've been stuck for a while. Lurking around my house I have unfinished projects. Plans. Things I want to make and do but for my worries and fears of messing them up or doing them wrong I can't.

In October I started a jumper. It was going well, apart from the apparent pattern problems I didn't know about when I started. The pattern is quite easy and repetitive so I could easily remember it without having to sit there with the pattern all the time. And because its quite chunky wool it builds up quick.  It was going well, I got the back done and was part way up one of the front sides when I was distracted by a mystery knit along.

Correct cables. Not shown: incorrect cables.

For those not in the know, a mystery knit along is where a designer releases a knitting pattern in stages, with enough of a gap for everyone to finish each step before the next part is released (in theory anyway) and all you know before hand is what it might be. In this case it was a hat. I'm a hat lover, and the idea of it being a surprise intrigued me, so I signed up. I was even doing it properly, measured my head, did a tension square and everything. I bought some amazing wool (actually I bought two amazing balls but didn't check my yardage so could only actually use one). I learnt how to make a brim, took a couple of goes to get the band right but it was all going swimmingly. I didn't quite manage to keep up, I'm not the quickest knitter and a couple of busy days put me behind, so I was still soldiering on with part two when the final part came out. But when it was finally large enough to try on it dropped down around my ears. So it's been ripped back to the brim and is waiting for me to tackle it again.

Not currently a hat.

And of course Christmas came along, and all the faffing that goes with it (lots of baking, wrapping etc) which doesn't leave a lot of time for much else. I did manage to knit some small Christmas themed things, but they really are tiny.

No, I don't know why Santa has evil eyes either.

I started writing this post the week before Christmas, but along with everything else it got set aside. Then it was 'crimbo-limbo' which I mostly spent travelling to different parts of the country. And now it's New Year, and along with the knitting projects I already had on the go, the wine I need to bottle, the candles I need to redo (remember the candles I managed to not spontaneously combust? I left them on a table in the sun and the colour bleached), I was given books for Christmas. Cook books, knitting books and a gardening book. 

My garden is a large grey area at the moment, I want to move this year, buy a house of our own, but that means I have to make a decision (and I'm pretty awful at those). I have to a) dig up what I want to keep now, while it's dormant, grass over the beds and put up with an empty garden, or b) think about putting stuff in and maybe digging up/leaving it behind at a later date. Both are going to be a bit shit, and it doesn't help that I got James Wong's "Homegrown revolution" for Christmas because the list of things I want to grow gets longer every time I have a flick through (and even longer now I've been on Suttons Seeds and seen the plants I want for sale, I'm *this close* to buying something). But as I haven't even turned the bed over yet, my gardening credentials must be rock bottom and there's a picture of me in the local garden centre saying 'do not sell to this woman' (although my bad luck with keeping stuff alive may have earnt me that without my bed management failures). It doesn't help that I read my friend Dans's blog about her garden. I am jealous of the amount of fruit she gets, but then I also know how much time she's put in to it, and to get the same I need to as well, but it'd just be nice to get more than one or two gooseberries a year.

On the other hand, the courgettes do keep me amused if not fed.

So now what? I've written a big ol' whiney blog post and what have I got out of it? I think I feel better. I need a plan. I almost feel enthusiastic (but not quite because I've got a stupid cold and have had hiccups all day). I need to pick a knitting project (probably get the hat done and out the way) and then go back to my one-project-cast-on-at-a-time rule. I'm going to start container gardening (I *really* hate weeding anyway) which means I can pick up and take the plants when we do move, and hopefully protect them from the wind a bit more.

I'd love to know how the kiwi didn't blow over too.

And all my other little niggles? Well, it's the New Year, and I guess I just have to remember that the things I do are meant to be Fun. Maybe I will make a dress from the patterns I bought last year (but maybe not in the white fabric, I'll get something more basic) And maybe I will dye my hand spun yarn. And maybe I will make my own soap (my lovely friend Dans (from above) gave me a book that, amongst other things, tells you how to make soap). And maybe I'll do all sorts of other things. But at the end of the day it's just fun and something new to try, and if they go wrong it's not the end of the world.

Bugger, that's gone a bit twee.

Arse. Tits. Wank.

That's better.

Tuesday, 17 September 2013

Relight my fire...

Finally a blog that's not food or knitting. A long time ago I was given a candle making kit for Christmas. Being clumsy and having a never ending fear of ruining things I've never used it. And it's always eaten away at me, the idea that someone bought something for me that I've not used. Talk about stuck between a rock and a hard place, guilt of not using something but also being afraid of ruining it if I do. 

So, I was in Ikea with my mum and we were looking at the candles and there were candles in glasses and some really nice glass bowls (what I can only describe as sweet dishes). They were there to hold night lights, but we thought it was a real shame they weren't filled in with a full candle. 

Knowing I had a kit, and with my casual "sure, I can do that" attitude (it's normally used more for when we see something being cooked on tv, not something I have no experience with), I bought a double boiler in the kitchen department and headed home. After a quick internet search, and minor panic, I set about making candles.

Pretty bowls.
Equipment

Heating wax is really easy, the only thing you have to watch out for is the wax reaching it's flash point and bursting into flame.

Yup, spontaneously combusting wax. And you wondered why I put this off. To stop it doing this the wax needs to be melted over water, like chocolate, because it gives a more even and controllable heat. I bought a double boiler that looks like a sieve that has no holes that rests on the saucepan. Other people buy slightly more substantial pans with a compartment that fits on top like a steamer. I read one set of instructions that suggested using an old bean tin. As long as the wax is in indirect contact with the heat then it doesn't matter. Just never ever put it in the microwave. Unless you buy wax that you can.


 Wicks. They come in lots of types, made of different materials, waxed and unwaxed, but the two main types are the ones with a stand and the ones without. My kit came with the wick without a stand, if I wanted to use it with the moulds I would have to thread it through the mould, use "mould seal" (or blue tack) at the base and tie it up at the other. Because I don't have an end to thread the wick through I used a wick with a base so it would stand up.

Wax. There's loads of wax out there, bees wax, paraffin wax, soy wax. My kit came with paraffin beads so that's what I used, but I think soy wax is meant to have a better burn.

Embelishments. To colour and scent my candles I went to hobby craft and bought a block of dye and a bottle of oil. Not all essential oils can be suspended in wax so make sure it says on the bottle if it's suitable. Alternatively you can mix some scent in a small amount of molten wax in something like an egg cup, and if when the wax solidifies again there is oil in the container then it's come out of solution and isn't suitable.

Method
Once you've got everything ready it's fairly simple. To work out how much wax you need, just remember that 1ml =1g. I filled my containers with water then poured that into a measuring jug. I then put the equivalent amount of wax (plus a little for just in case) into the double boiler over gently boiling water, but without touching the water. Slowly the wax should melt, mine possibly a bit more slowly because I wasn't sure how fast it would melt. 


Once melted, add the colour and scent. Add the colour slowly, you can always add more but not take away. The colour will only show properly when it's solid so you may have to cool small amounts to check it. I added a couple of tea spoons of oil, but the bottle should give you an idea of how much you need to add.

Pour molten wax into containers, holding some back, and insert wick. As the wax cools it may form a ring, break the wax and top up with the reserved wax. I didn't quite catch this so I tried to fill in the dimple and it just looked a bit rubbish, hopefully when they're used the wax will melt and even itself out a bit.


So, the finished product, although not perfect, was exactly what my mum was after, and the fact she forgot to take them last time I saw her I'm sure was a memory failure and not a comment on the candles. 


This was actually kind of fun, when I wasn't worrying about things exploding. And it was nice to give someone something that wasn't edible for a change, and the bowls can easily be reused. I think I'll be making more candles with the moulds in my kit (so if you know me, you may be getting one for Christmas!)


Jam update: Mum did remember to take a jar of jam with her, which her and dad practically finished in two sittings. Goes well with brie apparently.

Monday, 19 August 2013

Jamjamjam

"Over the centuries, wizards and alchemists have used all the power and magic they could muster to try and catch rainbows, spin straw into gold, and even bring the dead back to life. They've failed of course. Yet all the while, humble peasants and ordinary housewives have go on with the simple business of bottling sunshine, so that it may spread a little joy in the leaner seasons...They call it jam."  Hugh Fearnley-Whittingstall

Ok, so yesterday I had a go at making jam. It's always seemed a bit daunting for some reason, the boiling, the sugar, making sure everything is sterile. It always seems to need a lot of stuff like special pans, muslin and stuff. But it turns out you don't really need all that.

At the end of my drive is a massive plum bush. It doesn't really belong to anyone, both me and my neighbour rent and I can't imagine the landlords caring who picks what fruit. Normally the fruit is left to the birds and just falls off but that's just a waste and I wanted to do more.


I was given the River Cottage handbook "Preserves", by Pam 'the Jam' Corbin, last year, and it made me want to give it a go. It's a really good book, written by someone who knows her stuff and wants you to know it too, from jams and chutneys to pickles, leathers and alcohol. It covers the basics 'how to', has some standard, and not so standard, recipes and gives you the rules so that you can move yourself beyond the included recipes. I've really enjoyed just reading this book, and have lined up a 'to-do' list of recipes I want to try other than jam.

Now, not owning a 9 litre muslin pan (and at the cost of them I probably won't anytime soon) I wasn't going to make the full recipe. I also don't need 8 jars of jam lurking in the cupboard. So using the plum jam recipe I divided everything by 3 to fit in my smaller saucepan.

But, first things first, you must clean. I feel like I spent my entire weekend cleaning the kitchen (cleaned, made pasta, cleaned, made jam, cleaned, made curry...) but it's essential. Bacteria and fungi that lurk in kitchens could so easily spoil a batch of jam and that would a waste of time, sugar and fruit.

 
Plum jam

1.5 kg plums
1.25 kg granulated sugar


Plums. I used the wild ones by my house, but any plums can be used. Give 'em a rinse and cut them in half. The problem with wild plums is that they can be a bit...wild. from my 500g I had about 5 plums with maggots in. Totally gross. Luckily I had a few I'd picked but were going to go spare that I could make up the weight with. The original recipe says the to get the kernels out of the stones, boil and scrub them and add to the jam because they give it an almondy hint, but I didn't want to piss about with that.

Sterilise jam jars. Easy to do, wash in hot water then put in a low oven to dry off. I did it right right before I started so that they'd be dry by the time I needed them, but not sitting about so long they'd contaminated.


So into the saucepan goes the halved plums and 400ml water (or in my case a third of that) and let it simmer to soften the skin. I gave mine 25 minutes before deciding they were soft enough, this varies between varieties of plum. I also added in 1/2ish tsp of vanilla paste to make up for the lack of almond flavour. As the plums boil they smell amazing. I was taken back to when I was little, having been sent up some rickety old ladder by my nan to pick the ripe plums and green gages that grew in her massive, but mostly overgrown, garden. I never saw her make jam, but she used to stew the plums and we'd have it for pudding. She'd also put some in an ice cube tray so we could have them as a cold desert another time.


Add the sugar and give it a good stir to dissolve the sugar. This is when I put the thermometer in. I know there are other ways of checking if jam has reached setting point, but when something has "jam" written on it, it seems overly complicated to do anything else.


Once setting point has been reached, check the fruit isn't floating, apparently the sugar stays towards the bottom of the pan and needs to cook into the fruit for it to set.  Once the fruit is no longer floating, fill the jam jars while still hot.


And in theory that's it! My jams are in the cupboard, I'll give them a few weeks before breaking into one. Still seems a bit gloopy so I don't know if they'll set more or if my plums didn't have enough pectin and I should buy some proper jam sugar if I try again. As it is though I'd love to make some blackberry jam, there's so many hedges full of berries waiting to ripen, hopefully they'll be ready before I go on holiday!

Monday, 29 July 2013

The Breakfast pie.

This is not a pie for breakfast.*

I just want to make this clear. Pie for breakfast is a Bad Idea. This is a pie that contains breakfast. The idea for it started a year ago when I had friends down and I made them this pie. Between discussions about the pie and what we were having for breakfast someone referred to the pie as breakfast pie, and so as a surprise on their visit this year I made this for him.


Breakfast Pie

  • 1 pack puff pastry
  • 8 sausages, skin removed (I used Sainsburys Linconshire ones because they're a bit herby)
  • streaky bacon
  • mushrooms, chopped (I used one portabello and it was a bit much)
  • whole grain mustard
  • soft boiled eggs, peeled.
Preheat oven to 190C/170C fan. The original Picnic Pie recipe this is based on says to cut a third off the pastry and roll the larger part our to line a 20cm round tin. I can't get it to line a 20cm tin so I use an 18cm one. Mix the mushrooms and sausages before putting a layer in the bottom of the pie. Make indents to put the eggs in and gently place them in the pie. I boiled six eggs but only managed to get 4 into the pie because they're very difficult to peel. I can't offer tips here, they were a bloody pain in the arse and I had to put one in that was split otherwise there wouldn't have been enough.

Once the eggs are in, gently put a small amount of the sausage meat to cover the top of them. Put in a layer of streaky bacon and cover with some mustard. Top this with the rest of the sausage/mushroom mix.

Roll out the left over third of pastry for the top, decorate and wash with egg. Put in oven and cook for 50 mins or until a skewer comes out clean. Let it cool in the tin.

This was pretty good not long out of the oven but it was even better the next day cold. I've wondered how this could have been more breakfasty, tomatoes? Black pudding? Beans? The problem with tomatoes would have been too much fluid, the portabello I put in released a fair amount of water and tomatoes would have the same problem, and would result in the dreaded "soggy bottom". Black pudding would be ok, as long as everyone liked it, although I think it might over load the pie with meat (yes, I think you can have too much meat in a pie). And beans? Again a fluid issue, and it might make it too sweet.

Anyway, it made someone make this face, which makes me happy.


*Ok, if you want to eat it for breakfast that's fine. I've seen a lot worse things that people have for breakfast.