 |
| Not your run of the mill jumper. |
 |
| It was meant to look like this...honest. |
Rookie mistake number two was not double checking which sides I was sewing when putting it together so I managed to sew one side up with the right side of one piece and wrong side of the other both on the same side *slaps forehead* Putting the arms in was really simple too, just a case of picking up stitches, the correct number for the size I should have been making with the added panel I put in, and knitting. I was worried when I was doing it the sleeves may have been a bit long (being short sleeves sometimes are a bit long), but they've come out as great little cap sleeves, more or less.
 |
| Teeny-tiny sleeves. |
Once the two front pieces and back were attached, and arms put in, I could work on the hood. Really straightforward, just knitting straight rows to make what seems like a massive 80s collar before it's seamed across the top. When I reached the point that the pattern said to seam it just didn't seem big enough... so I did a few more rows. I now have a giant hood. It definitely covers my head, which I think is the basic purpose of a hood, even if it does restrict my vision a bit.
Last step was just the ribbed button band that runs all the way from the bottom of one side, around the hood and down the otherside. Took a bit of fiddling about, I didn't want to buy a massive cable I wasn't likely to use again, and although Knit Pro (the make of needles I use) make a small part to connect two shorter cables, neither of my local yarn shops stock it. So it was a case of knitting along one then unscrewing the needles, putting ends on, attaching the needles to another wire and then starting along that cable. I had a bit of trouble picking up the 150-odd stitches I had to in order to do this, I kept over and under picking, but a friend's mum told me when she has to pick up a lot of stitches, she divides it into manageable chunks and works out how many she needs in each block. Shame I'd already moved on when she told me about this.
 |
| It's macro time! |
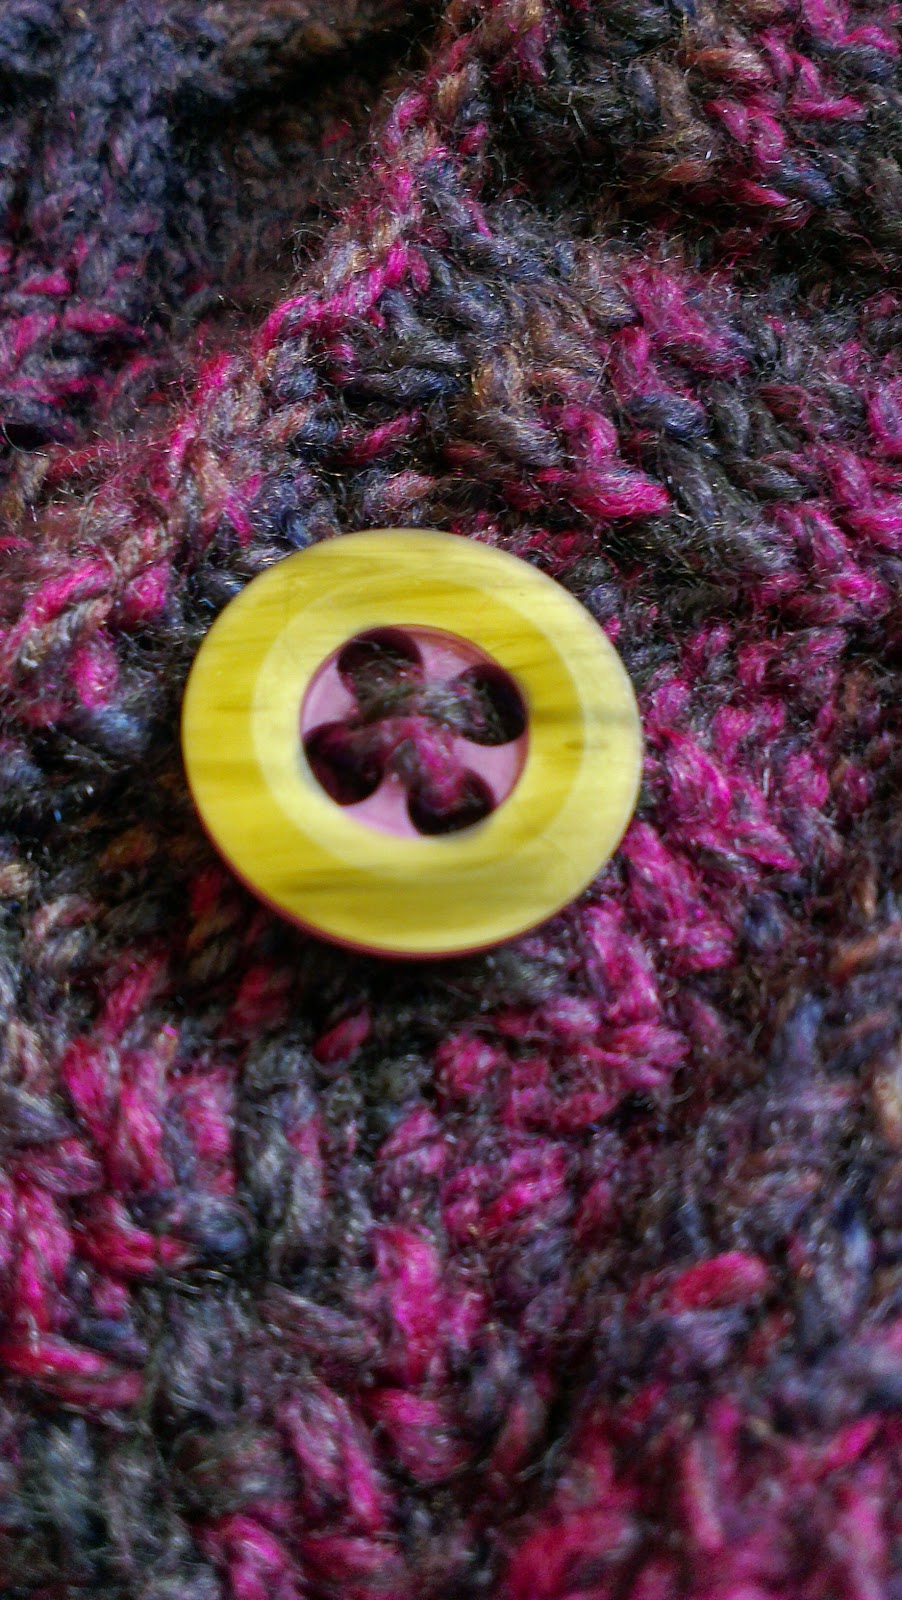
The button holes were simple bind-off/cast-on type, but I think I need to work on them, or pick a different cast-on because they're a little loose. The buttons were a bit of a find in the local everything shop, I wanted wooden ones, and these have purple that is a really good match for my wool.
 |
| Just so happy to have finished it. |
And voila, one jumper. I've worn it a couple of times, its really handy to have in the car, if it looks a bit grey and miserable before work I can wear it in and it squishes small enough to get in my bag if the weather picks up.